|
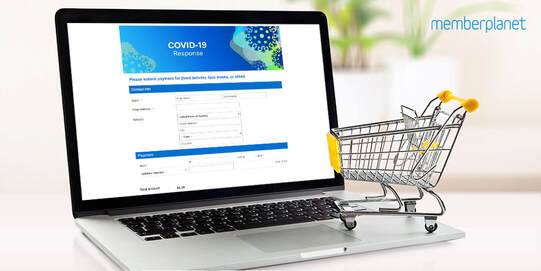
Contactless payments are now the norm as they can be done online and in one’s own home, reducing virus spread during the COVID-19 pandemic. Now whenever someone submits a payment form, administrators can be alerted immediately by setting up a notification via SMS text message. While memberplanet has always had online payment forms for contactless payments, text message notifications make it easier to facilitate curbside, contactless pickup. (View payment form templates and other COVID-19 templates.)
Organizations using memberplanet have set up grab-and-go services with these features and have kept their restaurants, clubs, and operations going. Below are some specific examples:
View full support documentation to learn more about managing payment form alerts.
These are just a few of the ways organizations are utilizing memberplanet. Learn more about the ways fraternities, nonprofits, PTAs, and other groups are using the platform in response to COVID-19.
0 Comments
We understand how critical staff and officer transitions are. You, or whomever is showing incoming officers the ropes, have a short window of time to get them up to speed with the applications, reports, and standard operating procedures to manage your organization. We’ve further optimized the process to get new administrators access to the memberplanet admin portal, so they can jump into the platform, stat! Our most recent enhancements are below. 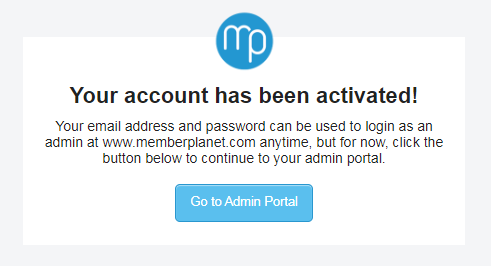 Easily assign and activate administrative users in your organization
A full-access administrative user can assign any number of admins and activate their accounts utilizing a more simplified process. After assigning a member of your group to an admin role, the new admin must activate the account. The admin who is assigning the role can send the activation email with a click of a button. The new admin simply needs to access the email and click the Claim Account button to be given access to the admin portal. Learn more about creating and assigning admin roles. Bank verification enhancements The bank verification process to collect funds on the platform has been updated to allow for less user errors and secure document upload. The admin user who is adding a new bank account will need to enter routing and account numbers twice to confirm the entry. A copy of a valid government-issued ID is required to complete banking verification. The document can be uploaded to the platform as a PNG, JPG, or PDF format. View documentation of the full process: How to Add and Verify Your Bank Account.
Our recent tech update has done a lot of heavy lifting in helping organizations optimize their donation campaigns. Other useful features to simplify membership include an enhanced email history report and renewal confirmation email. Check out our new features and let us know what you think!
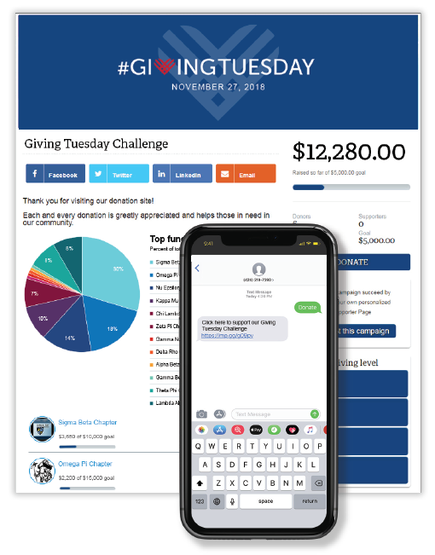
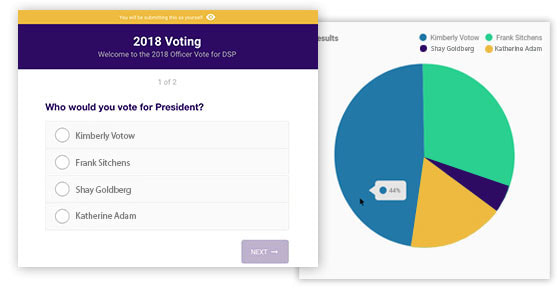
Text to give, RSVP, and more Take advantage of another channel to promote your donation campaign. Organizations that have a custom mobile number can now associate keywords with links to a donation campaign. When users SMS text a keyword associated with the campaign to your group’s custom mobile number, they will automatically receive a link to your associated donation campaign. Clicking the link will take a user directly to the mobile-friendly donation site, wherein they can donate online from any device. You can link multiple keywords in the instance that you’ve set up fundraiser or supporter pages. Anyone who misspells a keyword will still automatically receive a link to the main donation campaign. In addition to being used with a donation campaign, the text feature can also be associated with memberplanet’s event microsites, membership pages, payment forms and any other memberplanet URL. Users can text a keyword to your organization’s custom mobile number to receive an automated message with a link to the associated URL. This feature is currently available to those on Pro, Premium, or Enterprise plans and requires setup by our in-house support team. Customers can submit a request to the support team for more information. Display fundraisers who create a donation site in support of your campaign Now there’s a great way to visualize a donation campaign’s fundraisers and how much they’ve contributed. Fundraisers, or supporters who create a donation site in support of a donation campaign, can be displayed in a pie chart on the main page. For those campaigns that leverage the spirit of competition, this front-and-center statistical graphic indicates those who are leading in donations. Users can also hover over the pie chart to see the fundraiser associated with each slice. Learn more: How to Add the Fundraisers Pie Chart. Profile update email history includes date of profile update Admins can utilize the profile update request to email members to update their profiles – and members can make updates using a tokenized link in the email without having to log in. Admins can then check whether members updated their profile and further target or take action for those who did not. The email history includes how many people the profile update request was sent to, whether the email was delivered and opened, and whether the profile was updated from the link. If a member did update his or her profile, the date is included. Learn more about profile update requests. Membership card link included in member’s renewal confirmation email We’ve made the membership card available to access once a member renews membership. If your organization uses the membership card feature, once a member renews, the confirmation email will include a tokenized link to access the member card. Clicking the link will open a new page with the member card and another link to download as a PDF. Learn more about accessing membership cards. Schedule a chat with our team to learn more about how the memberplanet platform can help you manage, engage, and grow your organization. Facebook and Instagram polls are great for social engagement, but don’t quite cut it for official voting functions. Our new polls tool is useful to all organizations by allowing them to facilitate secure, professional voting for officer elections, awards, or other ballot and election-oriented tasks. We offer much more customization and useful features – such as the ability to include more than one question – than polls on social media. Administrators have the flexibility to customize who is qualified to take a poll, start and end times to access the poll, as well as the data displayed in real-time results. Note: If you are on an Enterprise plan, or belong to a chapter or club whose national or headquarters level has a partnership with memberplanet, you will have access to the polls feature. To get started, log in to memberplanet and follow the steps below to create, share, and view results for a poll. 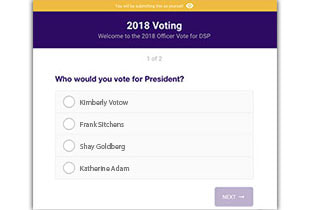 How to create a poll
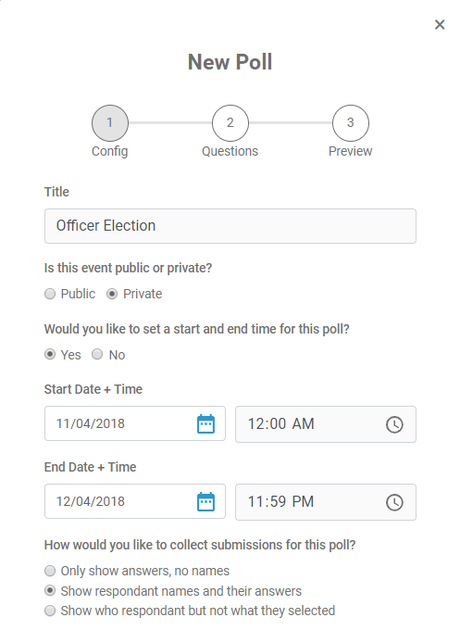
 3. Create a title for your poll, and answer the questions about what type of poll you’re creating:
Note: Private polls can only be viewed by invitation. Those who are not on the participant list will not be able to view the poll, even if someone attempts to share the URL.
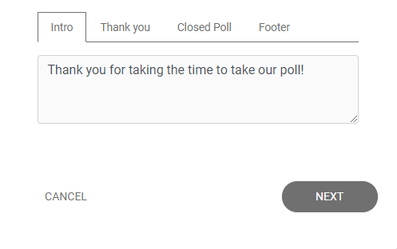
 4. Add any specific messages or instructions for the following:
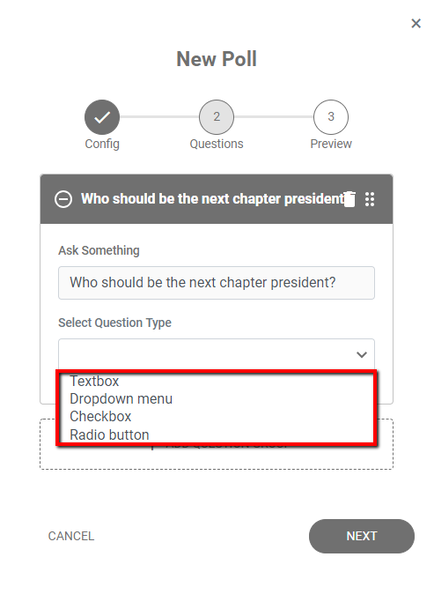
 5. Click Next to continue 6. Enter your poll question 7. Select the question type from the dropdown menu:
 8. Create the poll answers for the type of question you’ve chosen
Note: You can create as many questions for your poll as needed. There is no limit. 9. Click Next when you’ve completed adding questions/answers 10. Preview your poll and select either Save Draft or Publish when ready How to share a poll or invite participants
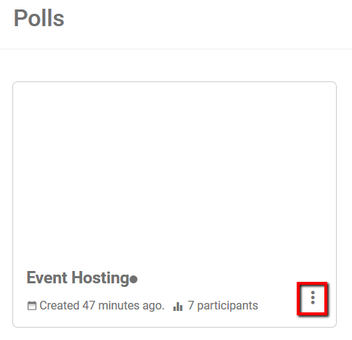
 3. Click Share 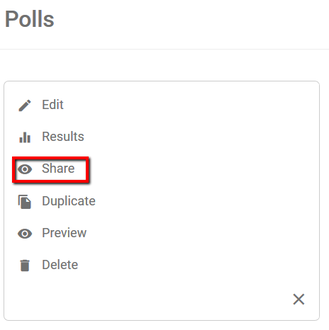 4. Copy and share the URL or click Invite Your Members to select one of three options: Add Manually: Enter the name and email addresses for those you want to share the poll with. Choose From Group: Share the poll with either all your members, your group's contacts, or both. Choose From List: Select members individually from your roster to share the poll with. Note: If your poll is private, you cannot share it via the URL provided. Only those invited to participate can view and take your poll. Anyone who attempts to view the poll outside of your participant list will receive messaging that they do not have access to view the poll. 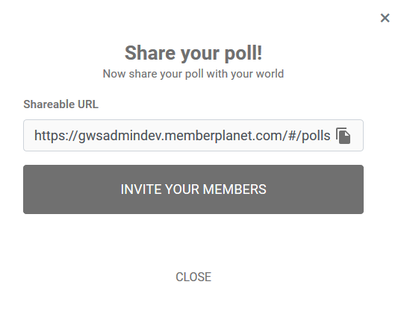 You can easily toggle a poll from public to private by clicking on the lock icon beside the poll name 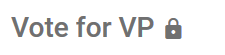 How to view poll results Admins can view poll results in real time without the hassle of waiting for tabulation. The data is presented both as a list of individual responses and as a pie chart for better graphical interpretation of the data.
 3. Click on Results 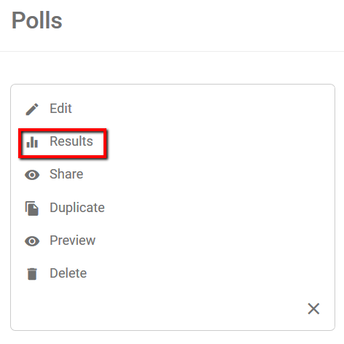 4. Click on any of the question groups displayed or the + symbol to view the poll results for each question  5. Depending on the configuration to create a poll, your results will show:
 There is also additional polls functionality that allows them to be paused or deleted, and poll results can easily be exported as an Excel file. View the full polls documentation in our Support Center. If you would like to take advantage of this feature on our Enterprise plan, please schedule a chat with me.
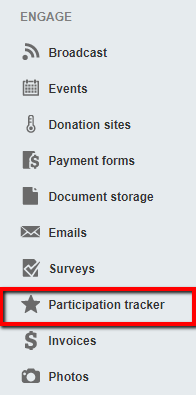
Participation Tracker: An Easier Way to Keep Track of Members’ Credits, Points, and Attendance12/19/2018 Member participation is a keen indicator of an organization’s overall health. The memberplanet participation tracker provides administrators a transparent and accountable way to record or award credit (or points, hours, or any other type of format) to members for their involvement in your activities, such as attending an event, completing study hours, or volunteering their time. This is an excellent tool to recognize and reward active members, monitor overall event attendance or track volunteer hours, and learn which activities are actively engaging your members. From a reporting perspective, there’s no need to keep clipboards or spreadsheets on file to log member participation. Your tracker data is securely recorded and tracked by date and time in a customizable reporting format. You’ll be able to see who received credits and which admin awarded participation, as well as make any edits without navigating away from the report. Participation tracker is available to organizations on an Enterprise plan. Get started by logging in to memberplanet and following the steps below to create, add member participation, and view the data in a tracker. How to create a participation tracker Admins easily get up and running by creating a tracker from our pre-set templates to track hours or points, but for full customization, these steps allow you create a tracker from scratch.
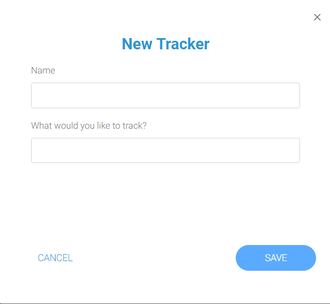
 2. Click on Add Tracker in the upper right corner  3. From the tracker menu select Create From Scratch  4. Enter a name for the new tracker and what format you’re tracking, such as credits, hours, or points
 5. Click Save to complete the process, and you will receive a message that your tracker has been successfully created 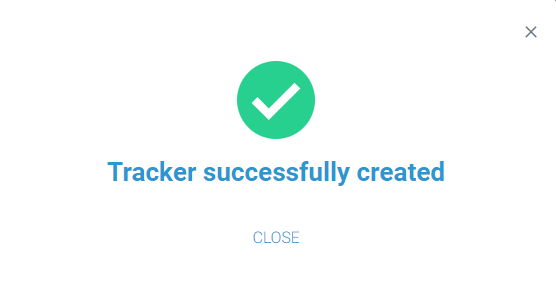 How to add member participation to a tracker Admins can add participation to any existing tracker. There are a few conditions to add participation: A tracker must already be created in order to add member participation to it, and the person you wish to add participation for must be a member of your organization.
 2. In the pop-up, search for the member you’re adding participation for by typing in the member's name, then select the person from the results populated
4. Enter the participation value 5. Add any related notes you wish to attach to this member’s participation 6. Click Save to complete the process 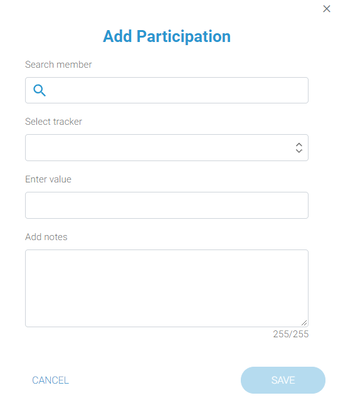
 How to view the data in a tracker Admins can view the data of a particular tracker at any time. Each participation tracker includes the member’s name and group ID number, the participation value earned for that tracker, and who awarded or added the participation.

 4. Admins can add hours while viewing a member’s participation details for a tracker by clicking Add Hours and entering participation information 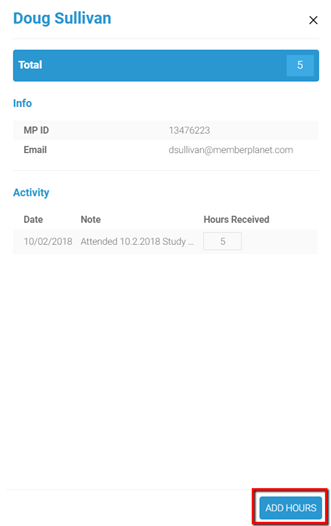 View the full participation tracker documentation in our Support Center. Admins can award participation credits for event attendance by linking a participation tracker to event check-in. Learn more: How to Add a Participation Tracker to an Event. Gaining visibility over member participation in your organization’s activities is paramount for understanding how effective your engagement efforts are – and therefore, how successful your organization is. To learn more about how memberplanet’s Enterprise features can help your organization, please contact me. About Matt ArnoldAs our Vice President of Business Development, Matt is dedicated to serving member-based organizations and small to mid-sized associations. With over 10 years of experience wearing various leadership hats as an Alpha Tau Omega alumnus, Matt specializes in all fraternal organization matters. Whether a group is challenged with growing membership or engaging members, he's got a solution. Coordinating a large event, such as a conference or annual meeting, where you’ve got multiple vendors, speakers, and a lot of eager attendees is plenty to deal with. While you might get a kick out of running the show, making sure everything goes smoothly (at least from the member perspective), and crossing off items on your to-do list, accurately tracking attendance is not something you need to stress over. Our recent tech update simplifies RSVP sharing and events check-in. Enable RSVPs and let members share their event invites Enabling RSVPs has awesome benefits – you can get a headcount ahead of time, generate event buzz by letting guests see who else has RSVP’d, and send tailored messages targeting people on your guest list based on their RSVP response. It’s a great way to promote online event registration and increase operational visibility on the days leading up to your event. Previously, some guests would forward their personalized invite to a friend. When their friend RSVP’d using the link from the invite, it registered as an RSVP from the initial email recipient. You can imagine how that would create a lot of confusion on the reporting side. Our recent fix added an option to verify whether the person’s name matches the name on the invite. If it doesn’t, they can log in with their own credentials and continue to RSVP. Here’s what your members will see when accessing an event invite:  When clicking the RSVP Now button from the email, the name on the invite will appear on the next screen. If it’s not their name, they can click the link to RSVP for someone else 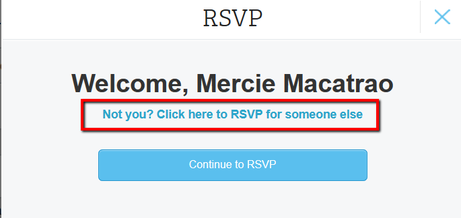 Members who click the link will be directed to the RSVP page where they can enter their basic information and click Continue to complete their RSVP. 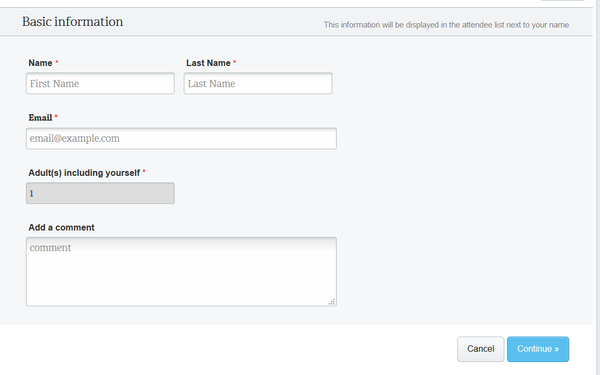 Record accurate attendance at your event by enabling check-in While RSVPing lets you track attendance before your event, the new check-in feature gives you the ability to accurately track and record attendance on the actual day of your event. On a smaller scale, this is also critical if your organization requires members to be physically present for an activity, such as a community outreach, weekly membership meeting, or a study session. Event check-in lets you:
Admins can record a check-in by requiring members to use a system-generated passcode or manually checking in attendees. Admins can also customize the start and end times of the check-in window and edit the check-in status of a member. Follow these steps to enable check-in:
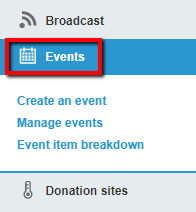 2. Click on an upcoming event you want to edit 3. On the top right of the event dashboard, click the Edit button  4. Scroll to the area below your event description, then click Yes to enable check-in 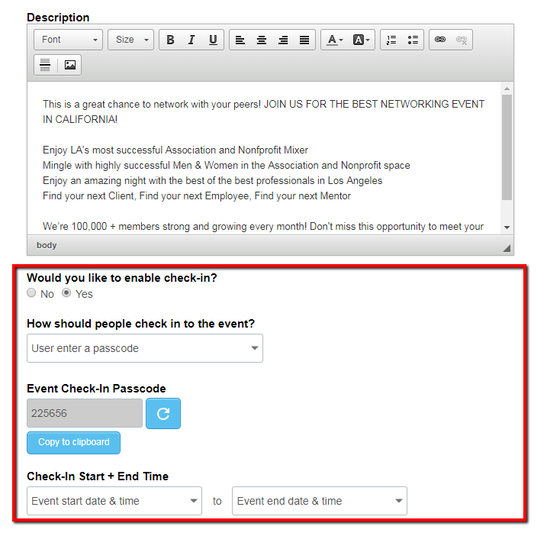 5. Select whether you want to use a passcode or manually check in attendees from the dropdown 6. Customize check-in start and end times if needed 7. Save your changes and continue editing your event details by clicking the Save and Customize button Add a participation tracker to your event If you are on an Enterprise plan, or belong to a chapter or club whose national or headquarters level has a partnership with memberplanet, you can automatically award and record credits for members when they check in. Admins can do this by linking an event check-in with a participation tracker.
2. Select Yes to add a tracker
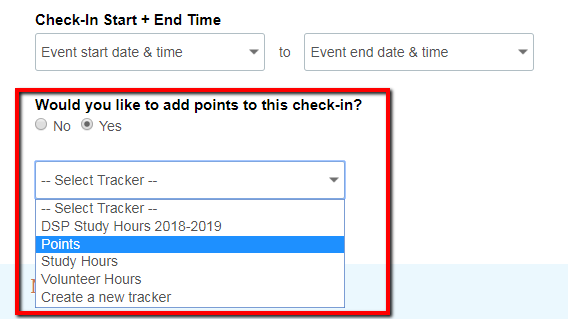 3. Select the tracker you wish to add 4. Type in a Participation Label, which will appear in your records 5. Type in the value of points (or credits, hours or any other unit) you wish to award for check in 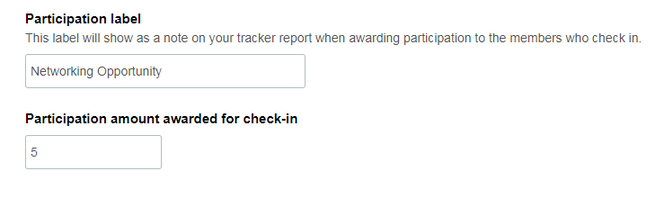 6. Click the Save & Customize button to save your changes and continue editing your event Learn more about the Participation Tracker feature, or click to view the full support documentation for enabling events check-in. If you would like to take advantage of this feature on our Enterprise plan, please schedule a chat with me.
You can spend 20 minutes flipping through the pages of your address book, or you can find exactly who and what you’re looking for in 20 seconds using your interactive directory on memberplanet. Welcome to the future of networking. 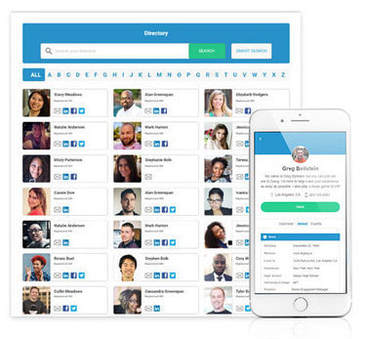 Our most recent launch of memberplanet includes an updated member directory that features a full library of your organization’s members, their profiles, and their personalized information. Each member’s data is only accessible by your group, and displayed information settings are controlled by individual privacy settings. Request that members showcase their education, career, member level, or group title on their profile, or alternatively allow them to maintain the mystery with as little disclosure possible (aside from required fields, of course). Networking has never been easier on memberplanet. You’re going to love this new look and feel. The possibilities are figuratively endless with the new interactive directory layout and settings. Individual profiles share, but are not limited to, events members are attending, public social media account links, and contact information. Set custom fields for your members to fill out so that the data populates across every profile. Don’t worry – having your members fill out their profile isn’t labor intensive. Some of the data will automatically populate based on their email address (which remains private) if it is associated with public social media accounts. Boost member-to-member interaction But wait, there’s more – when you take advantage of the many perks of the Pro or Premium subscriptions on memberplanet, you and your members will be able to utilize advanced search features. Select the Smart Search option within the search bar to look up members by any field of information your group collects. Clicking on a member profile will show the information that user has chosen to display. 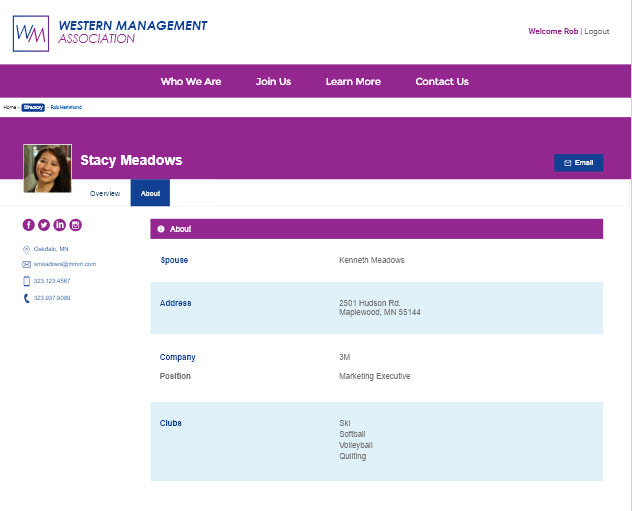 Give your members networking and mentorship opportunities, foster an online community, and improve engagement. They’ll have the ability to search other members in your organization using custom field data, such as who’s attending a specific event, similar interests, or who lives in the same city. 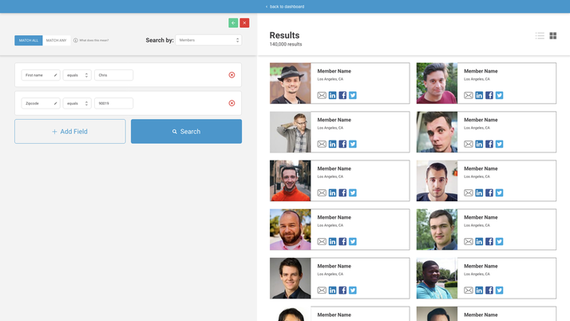 Note: If you are on an Enterprise plan, or belong to a chapter or club whose national or headquarters level has a partnership with memberplanet, your members can benefit from a more personalized experience. When coupled with our integrated websites, members can access the directory via secure login from your homepage. Multi-tiered organizations can allow their child groups, such as chapters, clubs, or units, to search members on a local and/or national level. 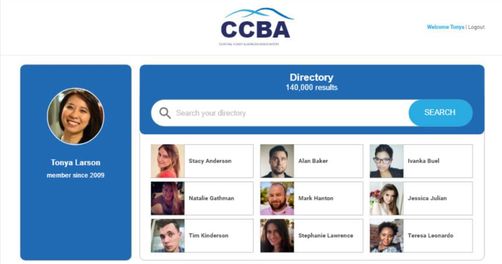 You can find out how to use these features by viewing the full interactive directory support documents in our Support Center. If you would like to learn more about how our Enterprise features such as the directory can give your members a truly interactive experience, please schedule a chat with our sales team. Updated since original publication on 7/19/18.
The all-new All Payments report has an updated look and feel that makes it cleaner and more user friendly. The report provides administrators with a bird’s-eye view of their organization and more detailed way to manage transaction-level data. Admins can easily view and manipulate data – without having to export to Excel (which you can still do, of course). If your organization has child groups, such as chapters or clubs, you can also see and sort transactions from your child groups in the same report. This report and its features are available on all subscription plans.
Key improvements
Powerful search functions Quickly parse organization data by utilizing search options like payment amounts, partial names like a last name only, and payment source. Every field displayed is searched, so if you enter in "30" in in the search box, you can rest assured that whether it appears in the date, is part of a string in reference numbers, or is shown in any other field, it will be listed in records returned. Enter your search terms in the search box located in the upper right side of your report, then click the magnifying glass icon to return results. 
Comprehensive accounting summary and functions
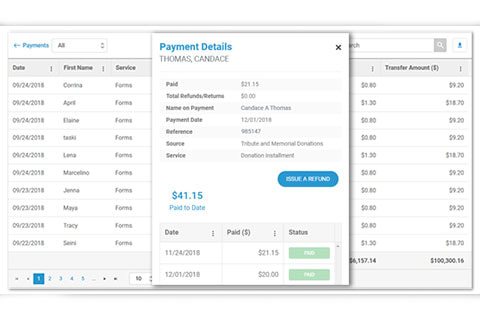
The report displays all your organizations transactions, and where admins have the permissions, they have convenience of issuing refunds from the same screen. Filter by payment type, and view payment details such as schedules of recurring and installment payments by simply clicking on a record. A detail screen will appear on the right-hand side. From there, an admin can view the status of payments without having to navigate away from the initial report. 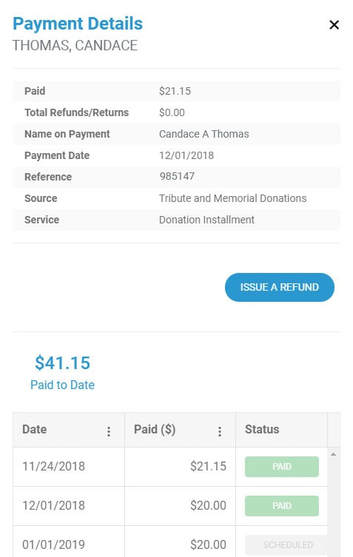
In one location, you can view complete running totals for payments, fees, and total transaction amounts for your entire organization.
Totals for your transaction data for the date range selected (not just page totals) is located at the bottom right of your All Payments report. 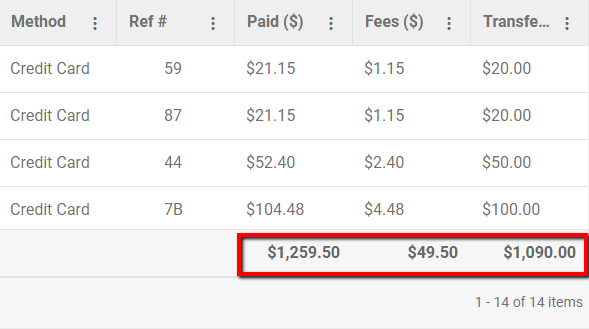
Improved date range search
Date parameters default to "any time," which is the time your organization began collecting funds on memberplanet to the present, so you start off by seeing the complete transaction information for the history of your group. The dropdown menu allows you to modify the date range, choose from other options, such as the last 30 days, or enter a specific date range. Click on the dropdown menu labeled Any Time at the top of the report to adjust date range. 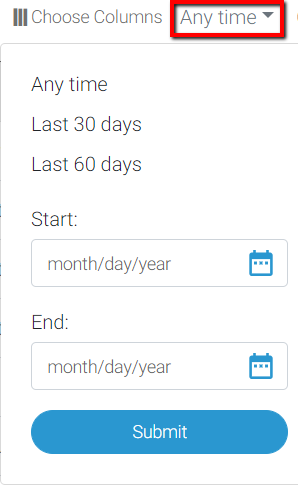
Quick Filters
These filters provide the ability to display payment activity by type of payment (installment or recurring) or memberplanet service such as events, donations, membership, and more to give you specific transaction details by source. Click on the Quick Filters dropdown menu at the top of your report to check off any combination of filters. 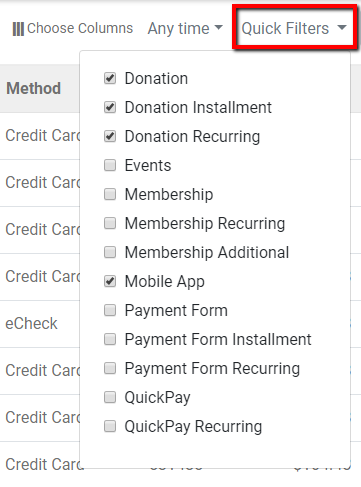
User-controlled view
The column data of your All Payments report is also configurable so you can show and hide data fields according to your viewing preference. Drag and drop columns to customize your report layout, and set column data to sort by ascending or descending. You can also lock columns to make it easier to view data as you scroll horizontally. Click on Choose Columns along the top of the report to add or remove column data, and to lock columns. 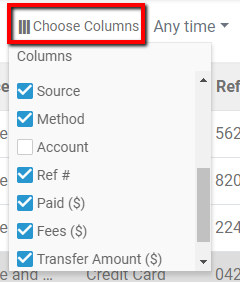
Parent/child report
Organizations that have a child groups such as chapters, clubs, or units, can now view all data for their child groups in one consolidated report. The All Payments report default setting is Activity in My Group, which will isolate your group’s records. To view all records, including activity in your child groups, select Activity in My Organization. 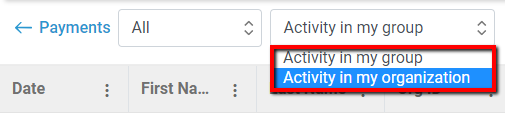
If you wish to view the former All Payments report, don't worry it's still available to you. Just click on the Former All Payments report link near the top of the page and you'll be directed back to it.
Log in to check out the new report or visit our Support Center to view the full All Payments report documentation. Updated since original publication on 8/21/18. Simplifying membership is what we do best – and we’ve been improving our platform’s features so group leaders like you don’t have to sweat this stuff. This quarter we’ve added the ability to further optimize how admins can utilize the tiers of membership that make up their group’s member levels, added installment payment reporting, updated the permissions admins can assign to group leaders to delegate their workload, and enhanced other useful member management features.
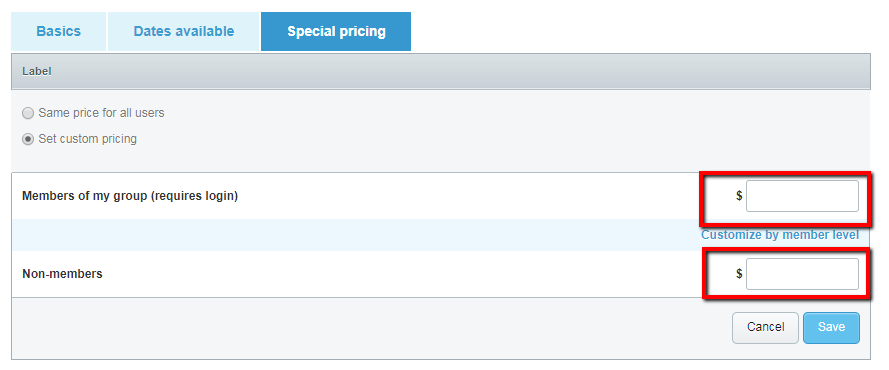
Automatically sort members into a distribution list based on member level Once initially set up, this admin feature allows you to automate the process of sorting new and renewing members into a distribution list for each member level in your group. This makes tailoring level-specific communications a breeze. Now precious time won’t be lost to allocating new and renewing members into a distribution list - it’s all done automatically as new people join your group or renew their membership. Learn how to automatically sort members into a distribution list based on levels. New report to track installment payments The increased flexibility of installment plans for members is a feature that helps groups grow and retain membership. The ability for admins to accurately track and monitor the progress of installment plans as it relates to fundraising goals or membership dues will help you keep your group on target. Learn how to view all your group’s transaction reports, including installment. Toggle on/off missed payment collections for lapsed group members Members may come and go within your group, and one way to encourage those looking to re-join is to not charge them for the payment cycles that passed while they were in lapsed status. Admins can now toggle this collection function on and off, so they have absolute control of the amount a returning member owes. Admins can waive those passed payments or decide to collect every payment from the date they left up to their return date. The choice is yours. Collect wisely. Learn how to enable or disable missed payment collection. New admin permissions to assign member levels and record offline payments Share your workload by assigning other group leaders permission to add member levels and record offline payments. This is incredibly beneficial if you’re accepting cash or checks for event tickets, merchandise, or any other donation or payment. Assigning leaders the ability to record offline payments within the group helps avoid inaccurate recording. You also don’t have to worry about them editing any of the other group accounting settings since this permission is specific to member level settings and offline payment recording. In essence you get all of the benefits and none of the worry. Find out more about admin roles and permissions. Updated membership level history report to display payment date and time This is an improved visibility feature for admins. This update essentially creates a log of all the actions taken within a member’s account. For example, the history tab will show when the last payment was made. or if the member was assigned a new member level. The update includes the ability to see when a payment was made, not just when the next is due for a given member. Overall, this allows admins to see all the actions taken within a member’s account, as well as showing you the results of that action. Learn how to view member level history for all members. To view the full release notes, please visit the memberplanet Support Center. You can share your thoughts with us on how we can further improve the customer experience by emailing [email protected]. We’ve kicked off the new year with some fresh tech updates to help make managing your members and growing your group even easier. All through the holidays, we’ve kept busy to enhance event management, improve our member database, and more. You gave us suggestions on how to update the user experience, and we’ve been listening! Check out what’s new and improved. Improved member database download New variable pricing for event tickets based on member levels Simplified process to add payment method Easier access to membership cards New auto-populating member distribution list Improved member database download Admins of groups of any size, even those with more than 100,000 members, can now easily download their entire member database. The whole process runs behind the scenes, allowing admins to continue working on the platform without having to pause so the database can download. A notification email is sent to the admin when the download is complete. Learn how to download your member database. New variable pricing for event tickets based on member levels Admins can now assign special pricing for tickets based on member levels rather than a flat price. For example, the price of an event ticket can be different for each membership level in your group, allowing you to give discounts and create added value for long-standing members. Here’s how to create event ticket prices based on member levels: 1. After you create an event, click Tickets & Payment Items in the RSVPs & Tickets section 2. On the Basics tab, fill out the information fields to create a ticket for the event, and click Save 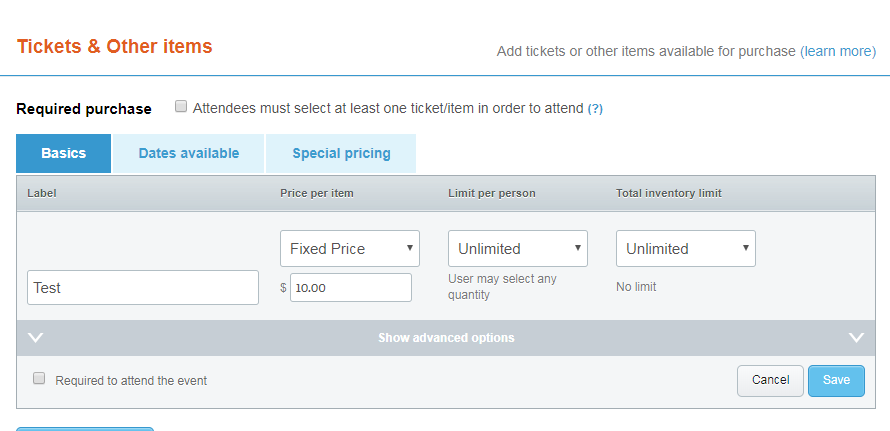 3. Select the Special Pricing tab 4. Click the Edit button for the event ticket you wish to create special pricing for 5. Select Set Custom Pricing
OR
 6. Click Save Simplified process to add payment method We’ve made it even easier for your members or donors to make online payments. When users add a new payment method, they now have the option to add this payment method to any already active recurring payment schedules. This improves the user experience by limiting re-entry of information (because no one wants to update payment info twice), as well as making sure they don’t accidentally miss a payment. Easier access to membership cards We’ve cut down on the number of clicks it takes to download a member’s card from desktop, and membership cards are even easier to access from the mobile app. The next time Jim and Pam show up to an event or meeting without their member cards, simply have them pull up their cards from their smartphone. Learn how to access and download membership cards. New auto-populating member distribution list Sending a customized message to members who’ve renewed their paid membership just got easier. (And you should absolutely do that to make your renewing members feel valued and special!) Admins can modify settings in paid membership levels to automatically sort those who join or renewed their membership into a distribution list. It’s a great way (and best practice) to connect with members by tailoring your message to specific recipients. For example, if you have monthly announcements for those on your top membership level, you can email them without manually updating a distribution list before every send. This feature works like our Smart Lists, and best of all, it’s free! (Before you start, make sure you’ve already created the distribution list you wish to auto-populate.) 1. Click Membership on the left navigation bar 2. Select Membership Levels, Sign-up and Renewal in the Joining our Group section 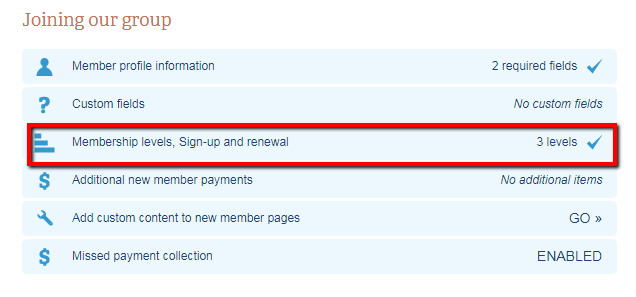 3. Click the gear icon on the member level you wish to edit 4. Scroll down and click Edit on the Sign-up and Renewal section 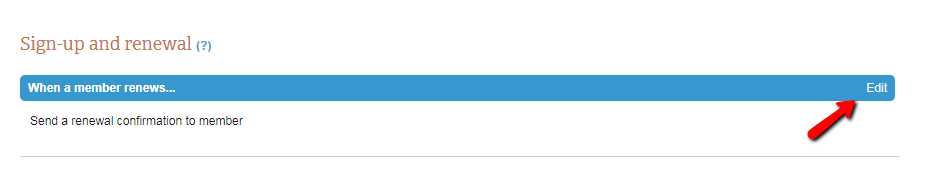 5. Select the Add Member to a Distribution List checkbox  6. Select the distribution list you wish automatically add members to 7. Click Save and Close We exist to simplify membership management, and for you and your admins, that means simplifying life as a leader. Share your thoughts with us on how we can further improve the customer experience by emailing [email protected].
|