|
We’ve kicked off the new year with some fresh tech updates to help make managing your members and growing your group even easier. All through the holidays, we’ve kept busy to enhance event management, improve our member database, and more. You gave us suggestions on how to update the user experience, and we’ve been listening! Check out what’s new and improved. Improved member database download New variable pricing for event tickets based on member levels Simplified process to add payment method Easier access to membership cards New auto-populating member distribution list Improved member database download Admins of groups of any size, even those with more than 100,000 members, can now easily download their entire member database. The whole process runs behind the scenes, allowing admins to continue working on the platform without having to pause so the database can download. A notification email is sent to the admin when the download is complete. Learn how to download your member database. New variable pricing for event tickets based on member levels Admins can now assign special pricing for tickets based on member levels rather than a flat price. For example, the price of an event ticket can be different for each membership level in your group, allowing you to give discounts and create added value for long-standing members. Here’s how to create event ticket prices based on member levels: 1. After you create an event, click Tickets & Payment Items in the RSVPs & Tickets section 2. On the Basics tab, fill out the information fields to create a ticket for the event, and click Save 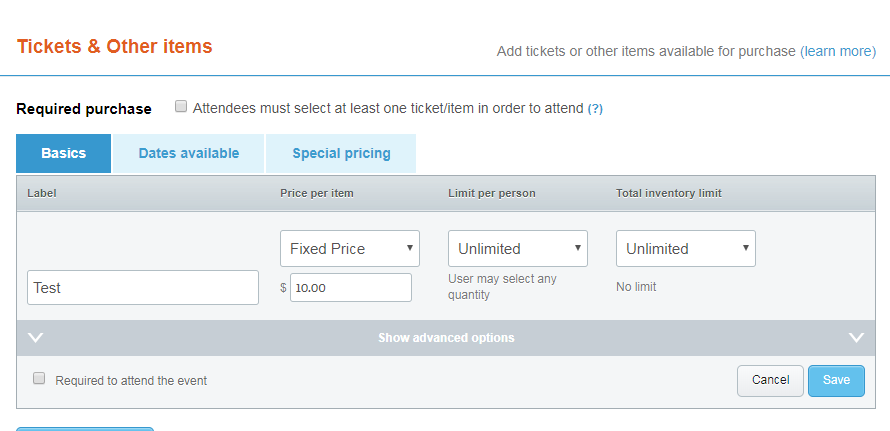 3. Select the Special Pricing tab 4. Click the Edit button for the event ticket you wish to create special pricing for 5. Select Set Custom Pricing
OR
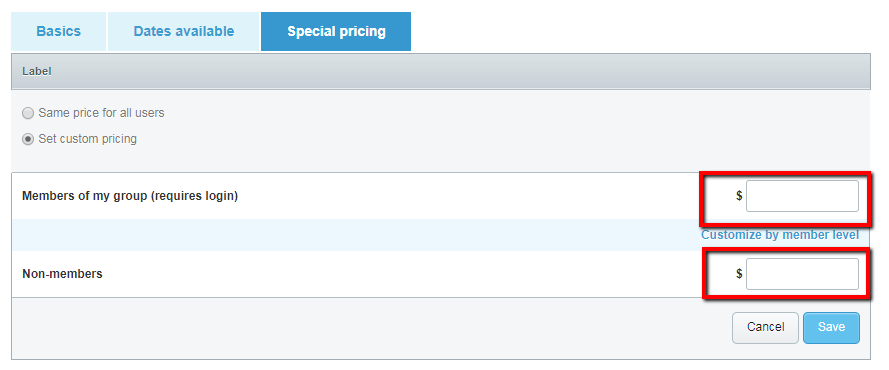 6. Click Save Simplified process to add payment method We’ve made it even easier for your members or donors to make online payments. When users add a new payment method, they now have the option to add this payment method to any already active recurring payment schedules. This improves the user experience by limiting re-entry of information (because no one wants to update payment info twice), as well as making sure they don’t accidentally miss a payment. Easier access to membership cards We’ve cut down on the number of clicks it takes to download a member’s card from desktop, and membership cards are even easier to access from the mobile app. The next time Jim and Pam show up to an event or meeting without their member cards, simply have them pull up their cards from their smartphone. Learn how to access and download membership cards. New auto-populating member distribution list Sending a customized message to members who’ve renewed their paid membership just got easier. (And you should absolutely do that to make your renewing members feel valued and special!) Admins can modify settings in paid membership levels to automatically sort those who join or renewed their membership into a distribution list. It’s a great way (and best practice) to connect with members by tailoring your message to specific recipients. For example, if you have monthly announcements for those on your top membership level, you can email them without manually updating a distribution list before every send. This feature works like our Smart Lists, and best of all, it’s free! (Before you start, make sure you’ve already created the distribution list you wish to auto-populate.) 1. Click Membership on the left navigation bar 2. Select Membership Levels, Sign-up and Renewal in the Joining our Group section 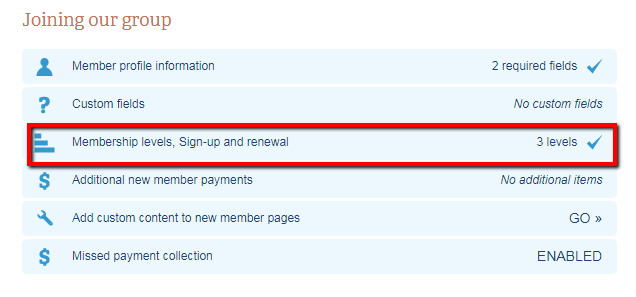 3. Click the gear icon on the member level you wish to edit 4. Scroll down and click Edit on the Sign-up and Renewal section 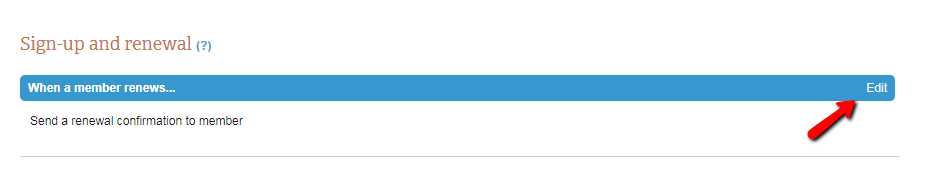 5. Select the Add Member to a Distribution List checkbox  6. Select the distribution list you wish automatically add members to 7. Click Save and Close We exist to simplify membership management, and for you and your admins, that means simplifying life as a leader. Share your thoughts with us on how we can further improve the customer experience by emailing [email protected].
0 Comments
Your comment will be posted after it is approved.
Leave a Reply. |