|
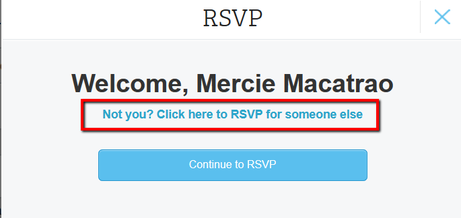
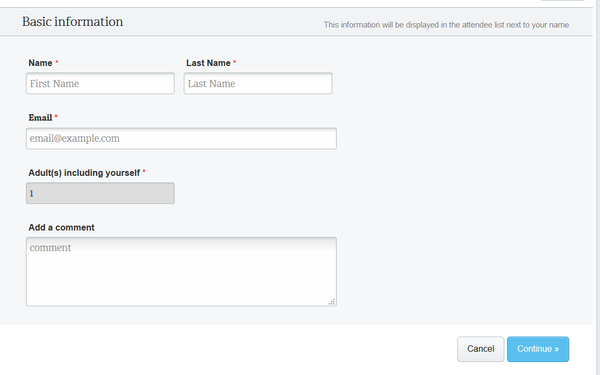
Coordinating a large event, such as a conference or annual meeting, where you’ve got multiple vendors, speakers, and a lot of eager attendees is plenty to deal with. While you might get a kick out of running the show, making sure everything goes smoothly (at least from the member perspective), and crossing off items on your to-do list, accurately tracking attendance is not something you need to stress over. Our recent tech update simplifies RSVP sharing and events check-in. Enable RSVPs and let members share their event invites Enabling RSVPs has awesome benefits – you can get a headcount ahead of time, generate event buzz by letting guests see who else has RSVP’d, and send tailored messages targeting people on your guest list based on their RSVP response. It’s a great way to promote online event registration and increase operational visibility on the days leading up to your event. Previously, some guests would forward their personalized invite to a friend. When their friend RSVP’d using the link from the invite, it registered as an RSVP from the initial email recipient. You can imagine how that would create a lot of confusion on the reporting side. Our recent fix added an option to verify whether the person’s name matches the name on the invite. If it doesn’t, they can log in with their own credentials and continue to RSVP. Here’s what your members will see when accessing an event invite: When clicking the RSVP Now button from the email, the name on the invite will appear on the next screen. If it’s not their name, they can click the link to RSVP for someone else Members who click the link will be directed to the RSVP page where they can enter their basic information and click Continue to complete their RSVP. Record accurate attendance at your event by enabling check-in While RSVPing lets you track attendance before your event, the new check-in feature gives you the ability to accurately track and record attendance on the actual day of your event. On a smaller scale, this is also critical if your organization requires members to be physically present for an activity, such as a community outreach, weekly membership meeting, or a study session. Event check-in lets you:
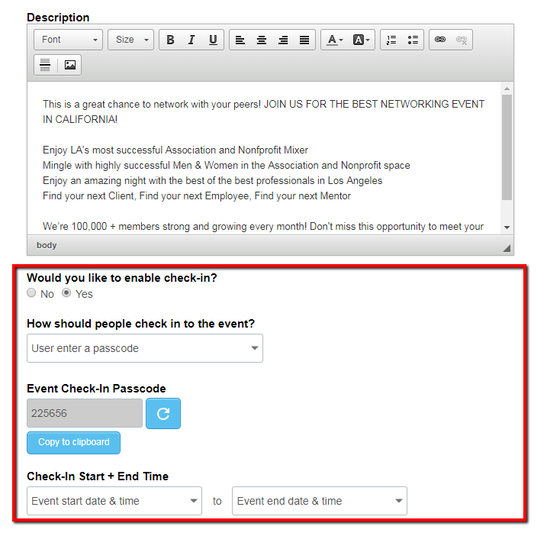
Admins can record a check-in by requiring members to use a system-generated passcode or manually checking in attendees. Admins can also customize the start and end times of the check-in window and edit the check-in status of a member. Follow these steps to enable check-in:
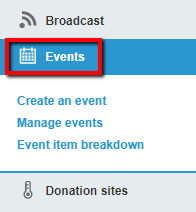
2. Click on an upcoming event you want to edit 3. On the top right of the event dashboard, click the Edit button 4. Scroll to the area below your event description, then click Yes to enable check-in 5. Select whether you want to use a passcode or manually check in attendees from the dropdown 6. Customize check-in start and end times if needed 7. Save your changes and continue editing your event details by clicking the Save and Customize button Add a participation tracker to your event If you are on an Enterprise plan, or belong to a chapter or club whose national or headquarters level has a partnership with memberplanet, you can automatically award and record credits for members when they check in. Admins can do this by linking an event check-in with a participation tracker.
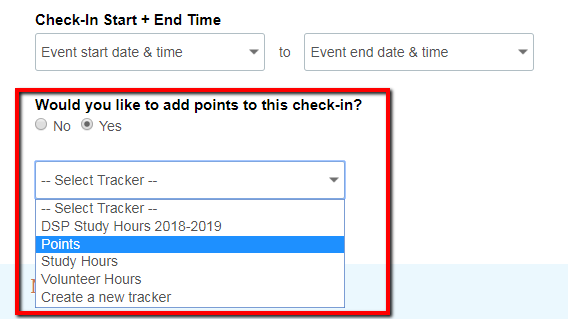
2. Select Yes to add a tracker
3. Select the tracker you wish to add 4. Type in a Participation Label, which will appear in your records 5. Type in the value of points (or credits, hours or any other unit) you wish to award for check in 6. Click the Save & Customize button to save your changes and continue editing your event Learn more about the Participation Tracker feature, or click to view the full support documentation for enabling events check-in. If you would like to take advantage of this feature on our Enterprise plan, please schedule a chat with me.
0 Comments
Your comment will be posted after it is approved.
Leave a Reply. |

